
Tag Archive: tempering chocolate
Tips for Tempering Chocolate
August 1, 2023
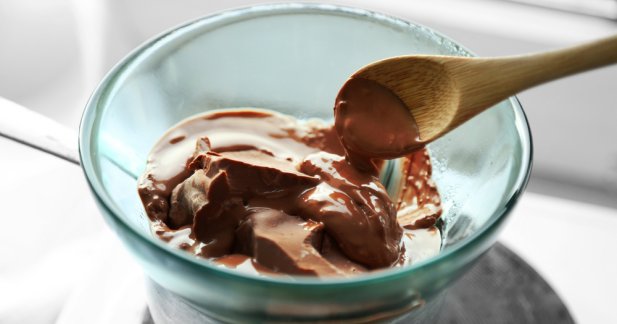
Chocolate is a wonderful treat that we all love, with its smooth texture and mouthwatering taste. But do you know there's a secret to making it look and taste even better? It's called "tempering chocolate," and it's like magic for your sweet creations.
6 Big Mistakes to Avoid When Making Homemade Chocolates
June 30, 2020
Chocolate is meant to bring a smile to your face… but what if it doesn’t? Well, you are not alone. The chocolate-making process is sometimes not so sweet!
While making chocolate may seem simple, it can be very technical to work with. Preparation, attention to detail, and the way you handle chocolate will have a huge impact on the end result.
To prevent your chocolatey treat from turning into a cocoa-tastrophe, here are 6 big mistakes to avoid when making homemade chocolate.
Science of Chocolate
August 23, 2011
Have you ever tried munching on chocolates and then think about its fragile crystal structure? Or do you even wonder about its milk protein contents as this melt-in-your-mouth goodness touches your palate? I bet no. The only thing you can think of is whether to get another bar or not, but there are people who take interest in this kind of scientific stuff.
Galit Segev, a chef and a biochemist in the pharmaceutical industry, enjoys her chocolates but is also enthralled by its physical properties. Having a background in such field, she is normally interested in why certain foods react variedly to certain cooking techniques.
She just recently had a part in the Ultimo Science Week talking about the science of chocolate such as how these treats are manufactured. From soil to your mouth, she gave a talk about what makes for a quality chocolate.
Chocolate Tempering: Crystal Sizes
April 1, 2011
Once people understand that chocolate tempering is the secret to getting great results for their own chocolate creations, I get a lot of related questions.
Here's a conversation with a student at a live, in-person session where I was talking about the crystal sizes, within the cocoa butter, for proper tempering.
Read more
Wax in Your Chocolate?
January 13, 2011
No, do not add wax to your chocolate!
It seems like I give tempering advice all the time. And I know why. Tempering chocolate should be easy, but it isn’t. And when struggling, people do one of two things: seek advice or look for ways to cheat.
Tempering is just one of those things that takes a lot of practice, and you have to be willing to learn from your mistakes.
If you are making chocolate-dipped candies and have trouble with the tempering process, you may be tempted to put paraffin or baker's wax into your coating to help it set.
Read more
It’s All About the Crystals
November 2, 2010
As many of you chocolate lovers already know, the fat in chocolate is called cocoa butter. What you might not know is that cocoa butter has special characteristics that make chocolate a very unique food.
One of those characteristics is that cocoa butter can crystallize in six different forms.
I've written before about tempering chocolate. What tempering does for chocolate is ensure that the cocoa butter solidifies into the best form of crystal.
Read more
The Shelf Life of Chocolate
August 29, 2010
It's Q&A time. Here is another question from a subscriber:
"Once chocolate has been melted, how long is it good for once it has been molded (again)?"
Chocolate is a very versatile and tolerant product to work with, the nuances of tempering aside. Chocolate can be melted, tempered and molded, re-melted, re-tempered and re-molded, again and again.
The shelf life of chocolate depends on whether it is milk or dark and whether or not it has inclusions like nuts, coconut, or dried fruit.
Read more
Troubleshoot Chocolate Tempering
February 18, 2010
Recently I was asked about tempered chocolate that fails to keep a good shine and what can be done to fix that? (See comments on how to temper chocolate page.)
That's a really good question. Concerns about the streaking and the lack of shine make me think about how temperatures, crystal development and the appearance of chocolate are all connected.
Properly tempered chocolate is shiny and uniform in color. When chocolate has streaks and does not shine, it indicates that at some point in the production process, the chocolate solidified without being in a properly tempered state.
Read more
Avoid Mistakes While Tempering Chocolate
November 12, 2009
As a follow-up to a few recent posts about tempering chocolate, I thought it might be useful to discuss some common mistakes you might make when tempering.
The most common mistakes I see are the lack of temperature control, lack of proper stirring, not choosing the right chocolate for the job, improper storage, and letting moisture contact the chocolate.
Let’s take a closer look at each of these situations...
Read more
How to Temper Chocolate (Step 2 – Finish)
October 8, 2009
When you buy chocolate in the store, it is already tempered. (At least it should be!) Basically this means it is in a stable solid form at room temperature.
If you want to get down to the business of eating the chocolate straight out of the package, no problem, just break off a chunk and go to it! But, if you want to use the chocolate for any other purpose you may have to re-temper.
This is the final part in my series of tempering chocolate. The first article was about the importance of tempering chocolate. The last article was about melting the chocolate to get ready for tempering.
Read more