
Tag Archive: chocolate lessons

The Art Of Eating A Chocolate
June 14, 2022
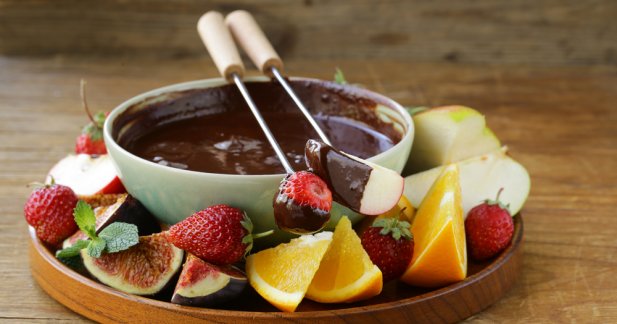
Eating a chocolate varies depending on people’s intention, time, location, etc. I could just tell you to pop it in your mouth and munch on it and this article will be over, huh? But to some people, it would mean savoring the different flavors and aroma and getting lost into it, just like how you would be mesmerized on a specific work of art.
What am I talking about? Continue reading to find out!
Ways To Incorporate Dark Chocolate In Your Daily Diet
March 8, 2022
Going on a diet and cutting out sweets is incredibly hard when you are a chocolate lover… If you are cutting some calorie intake, then you are surely trying to get as far as you can from desserts. Looking for more ways to incorporate dark chocolate in your daily diet? Continue reading for some tips!
Chocolate Myth vs Fact
July 26, 2012
In all the years of my existence, there is not one person I know who does not like chocolate. I mean if you dislike this sweet treat then you must be seriously disturbed, right? Kidding aside, the thought of hating chocolate does not simply register in my mind. But if you really do, then I demand a detailed explanation.
Yes it is true that chocolate contains caffeine, but not in dangerous amounts. You can still enjoy chocolate with only little touches of caffeine like the ones in milk chocolate.
They also say that chocolate is associated with acne. You can put the blame in the natural changes in the body as one ages, or charge chocolate for causing your breakouts. But truth be told, there has been no evidence-based proof that chocolate is linked to acne.
Read more
Lecithin in Chocolate
August 22, 2010
Take a look at an ingredient label on a bar of chocolate. 9 times out of 10 you will see soy lecithin listed there.
Is using lecithin as an ingredient in chocolate important, and what is the benefit of using it?
Look! It’s a Bean to Bar Chocolate
August 19, 2010
 Every now and again you will come across an article, a chocolate bar, or a chocolate company that will draw attention to Bean To Bar processing.
Bean to bar means quite literally that the product was manufactured from the roasting and grinding of the bean to the tempering and packaging of the chocolate.
Read more
Chocolate and Beer Pairing – Pale Ales
August 1, 2010
In the opening post of this series I mentioned that there are three categories of beer that pair well with chocolates.
 The third group of beers include pale, bitter beers, such as India Pale Ales. These also tend to do well when paired with chocolate…
India Pale Ale was created in the 1820’s for the voyages between England and India. The three month voyage would have to cross the equator twice. So not only was the journey long, but it was also quite warm. Since time and high temperatures are bad for beer preservation, typical beers sent to India arrived in very poor condition.
Read more
Chocolate and Beer Pairing – Belgian Ales
July 25, 2010
In the opening post of this series I mentioned that there are three categories of beer that pair well with chocolates.
 A second group of beers are the Belgian-style ales...
These beers are typically amber to brown in color, with high alcohol content (often greater than 8%) and are usually quite fruity in their aroma. Candy sugar (like a hard rock candy) may be added to the barley malt to increase the alcohol level without darkening the color or making it too malty.
Read more
Orange Zest Seized My Chocolate
July 22, 2010
Recently, I was asked this question: “I love the taste of chocolate and orange but when I add orange zest to my coating it curdles. Why?”
 This presents an excellent technical lesson in working with chocolate.
The issue is moisture.
Read more
Chocolate and Beer Pairing – Stouts
July 9, 2010
In the opening post of this series I mentioned that there are three categories of beer that pair well with chocolates.
 The first group for pairing includes dark beers such as porters and stouts...
These beers are made using a good deal of roasted or burnt barley malt. In fact, one of the burnt barley malts is even called “chocolate malt.” It doesn't really have any chocolate in it, but rather the malt has been roasted or kilned until it acquires more of a chocolaty color.
Read more
Chocolate and Beer Pairing
June 16, 2010
When most people think about pairing chocolate with an alcoholic beverage the product they usually consider is wine. However, there are components in wine which can make these pairings difficult and often unpredictable.
Tannins in red wine can make dark chocolates seem more bitter, and the acidity in wines often does not balance well with the chocolate. Because of the variation in wine styles, even within varietals, it’s often difficult to generalize about ideal wine and chocolate pairings.
 This is not the case for beer!
Read more