
Tag Archive: working with chocolate
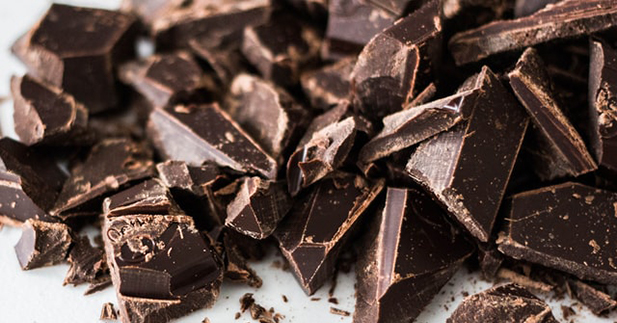
6 Big Mistakes to Avoid When Making Homemade Chocolates
June 30, 2020
Chocolate is meant to bring a smile to your face… but what if it doesn’t? Well, you are not alone. The chocolate-making process is sometimes not so sweet!
While making chocolate may seem simple, it can be very technical to work with. Preparation, attention to detail, and the way you handle chocolate will have a huge impact on the end result.
To prevent your chocolatey treat from turning into a cocoa-tastrophe, here are 6 big mistakes to avoid when making homemade chocolate.
From Diamonds To Chocolate
June 22, 2012
Designer Azature Pogosian, the jewelry designer who has black diamonds as a specialty, is all the rage in Hollywood. Hollywood A-listers such as Beyoncé, Rihanna, Fergier, Scarlett Johansson, and Miley Cyrus, among others, have been seen sporting his designs down the red carpet.
In 2007, he was able to launch his upmarket jewelries and has added an up-to-date fashion jewelry line, AZ by Azature, which you can get for $50-$850. In Houston, for a showcase of his collection at the St. Regis Hotel through Saturday, "The Black Diamond King" has also ventured into the chocolaty world. The designer has recently launched a high-end line of black-diamond pralines hand-made out of the rare "Wild Treasure" cocoa bean.
Read more
Part-time Rower, Part-time Chocolate Maker
June 12, 2012
Many of us have dreams. For some, those dreams include the Olympics.
Will Newell is a world class rower who trains much of his time at the Oklahoma City High Performance Center in the Devon Boathouse and Olympic Qualifier. He pointed out that many countries around the world provide their athletes with provisions that are much higher compared to United States athletes. That means the U.S. athletes have to find a way to make a living.
The Oklahoma City Boathouse Foundation sponsors athletes and helps them find jobs and housing while training as Olympic athletes. Newell and his fellow athlete Robin Prendes are currently members of a four lightweight crew. They have earned their way to the 2012 Olympics and are currently working part-time for Devon Energy.
Read more
Couverture Chocolate
January 19, 2012
It's hard to resist chocolates, no argument there. What if they're made with more cocoa butter than the regular ones? How mouth-watering could that get?
Couverture chocolate is a special form of high-class chocolate used by chocolate companies and chocolatiers. It has a way richer and creamier consistency as compared to regular chocolate due to the fact that it contains a higher amount of cocoa butter. And with the right tempering, you get a more polished and glossier chocolate with a crisper "snap" when broken. It’s perfect for coating, molding, garnishing and dipping.
Read more
Chocolate Campaign to Benefit Fukushima Kids
January 13, 2012
In 2006, a nongovernmental organization in Japan started an annual chocolate-selling campaign to benefit and provide support to pediatric cancer patients and hospitals in Iraqi cities, including Baghdad, Basra and Erbil. This year, some of the proceeds will go to the children in Fukushima Prefecture, where the tsunami-crippled Fukushima Daiichi nuclear power plant is situated.
Minoru Kamata, chief of the Japan Iraq Medical Network, said: "We received many messages of support from Iraqi people (after the March 11 earthquake and tsunami) that made us determine to allocate part of the proceeds for Fukushima." Kamata, a doctor and an author, has also shown his support for Belarus after the 1986 Chernobyl nuclear disaster by participating in medical programs. He also said that certain group members have played their parts in the removal of radiation in Fukushima Prefecture.
Read more
Festival of Chocolate
January 10, 2012
The Festival of Chocolate, Florida's only all-chocolate event and the grandest celebration of everything chocolate in the Southeastern United States, will be taking place on January 14-16, 2012 at the Museum of Science and Industry (MOSI).
Local and regional chocolate and confection companies will be featuring and selling treats such from truffles and cupcakes to ice cream and chocolate drinks.
Guests and patrons can also participate in fun chocolate competitions conducted for the young and the young-at-heart. Go nuts in piling a skyscraper of cookies or in their signature "Face the Cookie" contest.
Read more
From Bean To Bar
September 27, 2011
While in search of nature’s medicines, the Medicine Hunter named Chris Kilham is famous for his venture which entails trying out peculiar food, but the most recent one made him lean towards the "sweeter" side.
Just recently, Kilham took a trip to Mast Brothers Chocolate in Brooklyn, N.Y. to witness the behind-the-scenes in chocolate making.
Time and again, research has revealed that chocolate is in point of fact beneficial for you, health-wise. The benefits involve protecting the heart and mind, even sex drive.
In 2007, brothers Mike and Rick Mast started manufacturing organic chocolate made from some of the best cocoa beans worldwide, and they make approximately 5,000 bars every week .
Read more
The Different Types of Cacao Beans
September 15, 2011
Just because there’s only one species of Theobroma cacao doesn’t mean there are no different types of cacao beans. However, even experts themselves can’t seem to agree on how many types of cacao beans there actually are, but let’s stick with 4.
Why in the world would you even care about this mumbo jumbo? Well, for starters, one word, flavor. While most of us are happily content with any chocolate in hand just as long as it’s good, true blue chocolate lovers take pleasure in the subtle differences in aroma, taste, and texture between the different cacao bean varieties.
The first type of cacao beans is the Criollo. It was initially cultivated by the Mesoamericans and is generally considered to be the most excellent worldwide. It has a rich, intricate aroma, and a profound yet smooth flavor. Criollo beans require just a little fermentation and short roasting to draw out the flavors.
Read more
Chocolate and Cocoa Substitutes
January 28, 2011
Have you ever discovered you were out of an ingredient? Of course that always seems to happen right in the middle of making something!
When the recipe calls for chocolate, cocoa powder, or unsweetened baking chocolate, using the correct substitution can mean your crisis is avoided. And no emergency trip to the grocery store!
Read more
Working With Chocolate and Caramel Filling
August 8, 2010
 One of my email subscribers was wondering how chocolate candies made with high water content fillings, like caramel, can seemingly withstand blooming or other adverse effects?
It is true that even the smallest amount of water and chocolate don’t get along. The combination often leads to problems like seizing and sugar bloom. Yet, you can buy chocolate-covered caramels and see for yourself that they look good and tastes good. They have a fairly decent shelf life, too.
Read more