

Easy Homemade Chocolate Waffle Cone Recipe
February 14, 2023
Love waffle cones? Who says you need to go out to buy one? Creating your own chocolate waffle cones at home is even better than the ones they sell because you can use the ingredients that you want! Here is a quick and easy recipe to get you started.
Homemade chocolate waffle cones are like homemade cookies, you can tweak the recipe and you’ll love the outcome even more. You can customize the sweetness to your liking, and even swap your regular chocolate to dark ones.
Instead of making cones, you can also shape yours to a bowl or create different sizes! Create a fun activity by inviting the kids to help. You can have these with ice cream, crepes, or any other dessert that you want. Of course, you can also eat them on their own for a quick and crunchy chocolate fix. Oh, and did I mention you can do this within 10 minutes? Yup. I love them even more.
You will be needing a waffle cone press for a smooth experience. If you don’t have one, or you don’t want to buy one, you can just use your oven. However, there won’t be any patterns, but it won’t affect the taste. When using the waffle cone press, it usually comes with a mold when you buy it, so you can just roll the batter into cones when they’re ready. Or, you can also place them into an inverted bowl to shape them for chocolate waffle bowls.
|
Homemade Chocolate Waffle Cone Recipe What you need:
What to do: In a mixing bowl, whisk egg, sugar, and milk together. Then add the melted butter and vanilla. Sift powders and flour together and then add to the egg batter. Continue mixing until full combined and dough is thick. Heat waffle cone press. If using an oven, line baking sheet with parchment paper and preheat the oven to 350°F. Add 1-2 tablespoon of the batter to the waffle iron. You can adjust the amount depending on the manufacturing instructions. Close lid and allow to bake up to 45 seconds or until it set. Remove the waffle using a fork and wrap to a cone shape using the waffle iron mold. Let it cool for a few seconds before removing. If using bowls, cool upside-down to keep the shape. Repeat with the remaining batter. If using an oven, spread two tablespoons of batter to a circle. Work 2 circles at a time, and bake for about 10 minutes or until set. You can use a foil to form the cones. Do not use too much batter so the cones remain crispy. Cool completely and store at room temperature. Consume immediately or place in an airtight container for up to 3 days. And that’s it! Leftover batter can be frozen for up to 3 weeks so consider making a small batch at a time. |
That was easy, huh? Don’t forget to add your favorite toppings! Drizzle with melted white or dark chocolate, add sprinkles, powdered sugar, or chocolate syrup! It’s totally up to you!
For extra oomph, melt some dark chocolate and dip your waffle cones and waffle bowls. Double the chocolate, double the fun. 😉
Have some extra melted chocolate? Try making these chocolate covered raisins!
Making your own chocolate waffle cone soon? Share yours on social media and tag me on Facebook and Twitter so I can check them out!
What recipe do you want to learn next? Comment down below and let’s learn together!
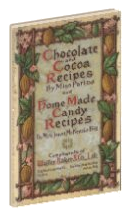 Chocolate And Cocoa Recipes From 1909
This holiday season, imagine serving some chocolate candies your guests have never seen! We took an old recipe book and updated it for easier use.
Click here to get your own copy of this fascinating cookbook.

- How to Build a Chocolate Charcuterie Board - July 21, 2026
- Easy Homemade Chocolate Mango Tart Recipe - July 14, 2026
- Why World Chocolate Day Is Worth Celebrating - July 7, 2026